CTR Original WP Plugin Version 6.x
This version works with the newest CTR platform
ChipTuning Reseller WP Plugin
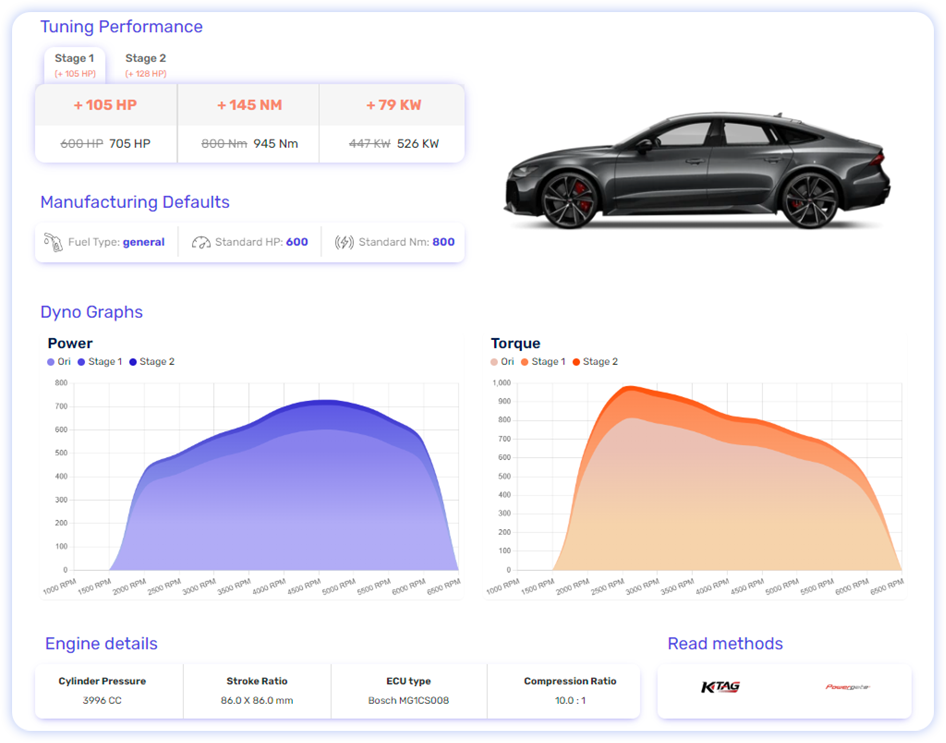
With our WordPress plugin, you can easily show vehicle information on your website. The only thing you need to do is download the plugin and install it into your WordPress site. With the API key you get from our support team, you can then access the data.
You can easily style the plugin with your own CSS files, or enable the built-in bootstrap CSS file to show the car selector to your customers.
Have special wishes? We are happy to help you implement special features or implement them globally when they are useful for others as well.
Documentation
We will document our WordPress plugin here as briefly as possible.
Most settings are very logic and easy to follow. Any questions? Send us a message!
Installation
Installing the plugin is fairly simple. Download the above ZIP file, save it somewhere you are familiar with, and log in to your WordPress environment.
Click ‘Plugins’ in the main menu and then click ‘Add new plugin’. Then click ‘Upload plugin’ to select the ZIP file.
Click the “Install now” button to start the installation. Afterward, click ‘Activate’ to activate the plugin.
YouTube & Vimeo
Adding YouTube videos is very easy, just add the YouTube link to a stage, and it will be displayed on your webpage.
You need to embed the embed code, for example “https://www.youtube.com/embed/OL_eIZjiLUk”
to make it appear in your website.
To do this, click on Share under the video, select Embed and then click and drag the src code, like in the example here on the left.
Configuration
After installing the plugin, you can configure it to suit your needs. The following options are mandatory:
- API Key: The API key you got from our support team
All the other options are optional:
- Your company name
- Shows the company name on the chiptuning page
- Default language
- Language in which the results will be shown
- Contact form link (URL)
- This will be the url where the customer will be redirected to when they click ‘More information’ on a stage. The parameters engine_id and stage_id will also be sent.
- Bootstrap CSS
- Wether or not to include bootstrap CSS file
- Show prices
- Show an indication price to your customers per stage. These are a globally default price.
- Price deviation
- If you want to ask more or less for the prices you can set it here
Important Notice
- Very important: If you are a registered customer on our new platform (data.chiptuningreseller.com) then you MUST use plugin V6!
- Important notice: Version 6 is NOT compatible with Version 5 (in terms of using old styles etc.) – Ask your account manager for help if you want to upgrade.
- For 3.x users that need to keep their own old styles; please make a backup of both the plugin folder and the ctr folder in wp_uploads. After upgrading to 4.x you can then place back old styles and templates where needed.
- Also copy all the settings in the chiptuningreseller setup pages to a safe place (especially your API key!)
-
Using WP Rocket? Add /chip-tuning/(.*)
to the list of exceptions in the advanced settings!
Download Original CTR Plugin
CTR Original WP Plugin Version 6.x
This version works with the newest CTR platform
Elevate your tuning business!
Embrace a world of possibilities tailored to your business and clients. Begin your journey with us today and unlock a new level of excellence in the automotive realm.
